T100 wannabe

My role in the Melbourne University Electrical Engineering Club is as the Autonomous Robotics Research Project (ARRP) officer. Our goal at ARRP is to provide fun, educational and awesome projects for students to build who may be beginners or experts.
This is because the University of Melbourne has a very theoretically head strong engineering degree, other than one subject, there is no real opportunity to build cool things.
This robotic arm project has all the boring logistics done such as ordering the parts, making sure the screws are correct and such, so the student only needs to focus on the control/programming aspect!
It serves to be an cheap & simple introduction to robotics so that students aren't discouraged, once completed the robot arm can have an array of interesting additions added on such as cameras, various graspers etc. etc.
The lovely MUEEC commitee has created an absolute 🔥 of a video to promote the robot arm
Next step for us is to make lots of these bad bois and try get suckers to buy them
|
Below shows you how the robotic system will work:
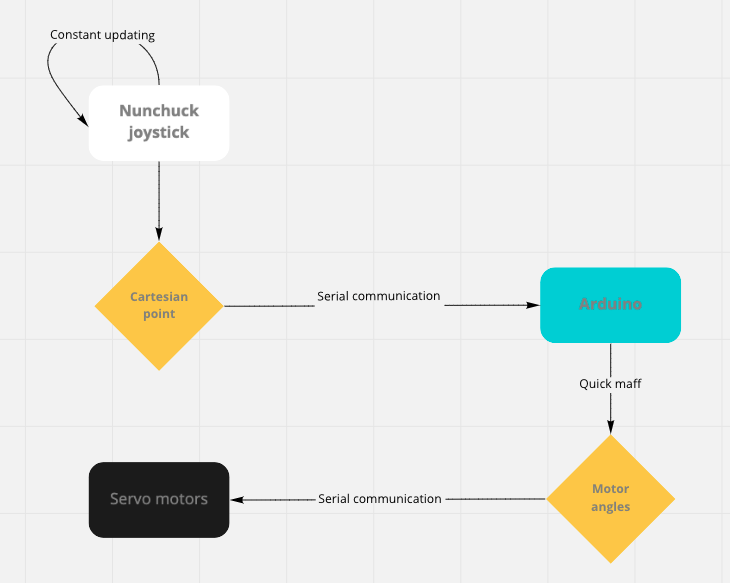
Using the arduino, we have the nunchuck send in the 3D coordinates (x,y,z), this will be converted into motor angles via some inverse kinematics calculations and the motors will then move in order to position the end of the arm at that point in space.
The inverse kinematics are calculated using trigonometry! The paper here details the derivation.
Look at this beast 😂
The robot is designed and simulated in Fusion360 and then later 3D printed with my Ender3 printer. In Fusion360 we were fully able to test the range that the robot arm can move in by making the connections specific joints.
A big part of the design was to make it modular so that you can easily add/take off arms as well as being cheap and easy to fix.

|
To power the all the servos as well as the Arduino we made a custom PCB board that can be powered by a 5V phone charge / battery pack. You could choose to either power both the Arduino and the motors with the wall socket or just power the motors and have the Arduino connected to your laptop for code testing.
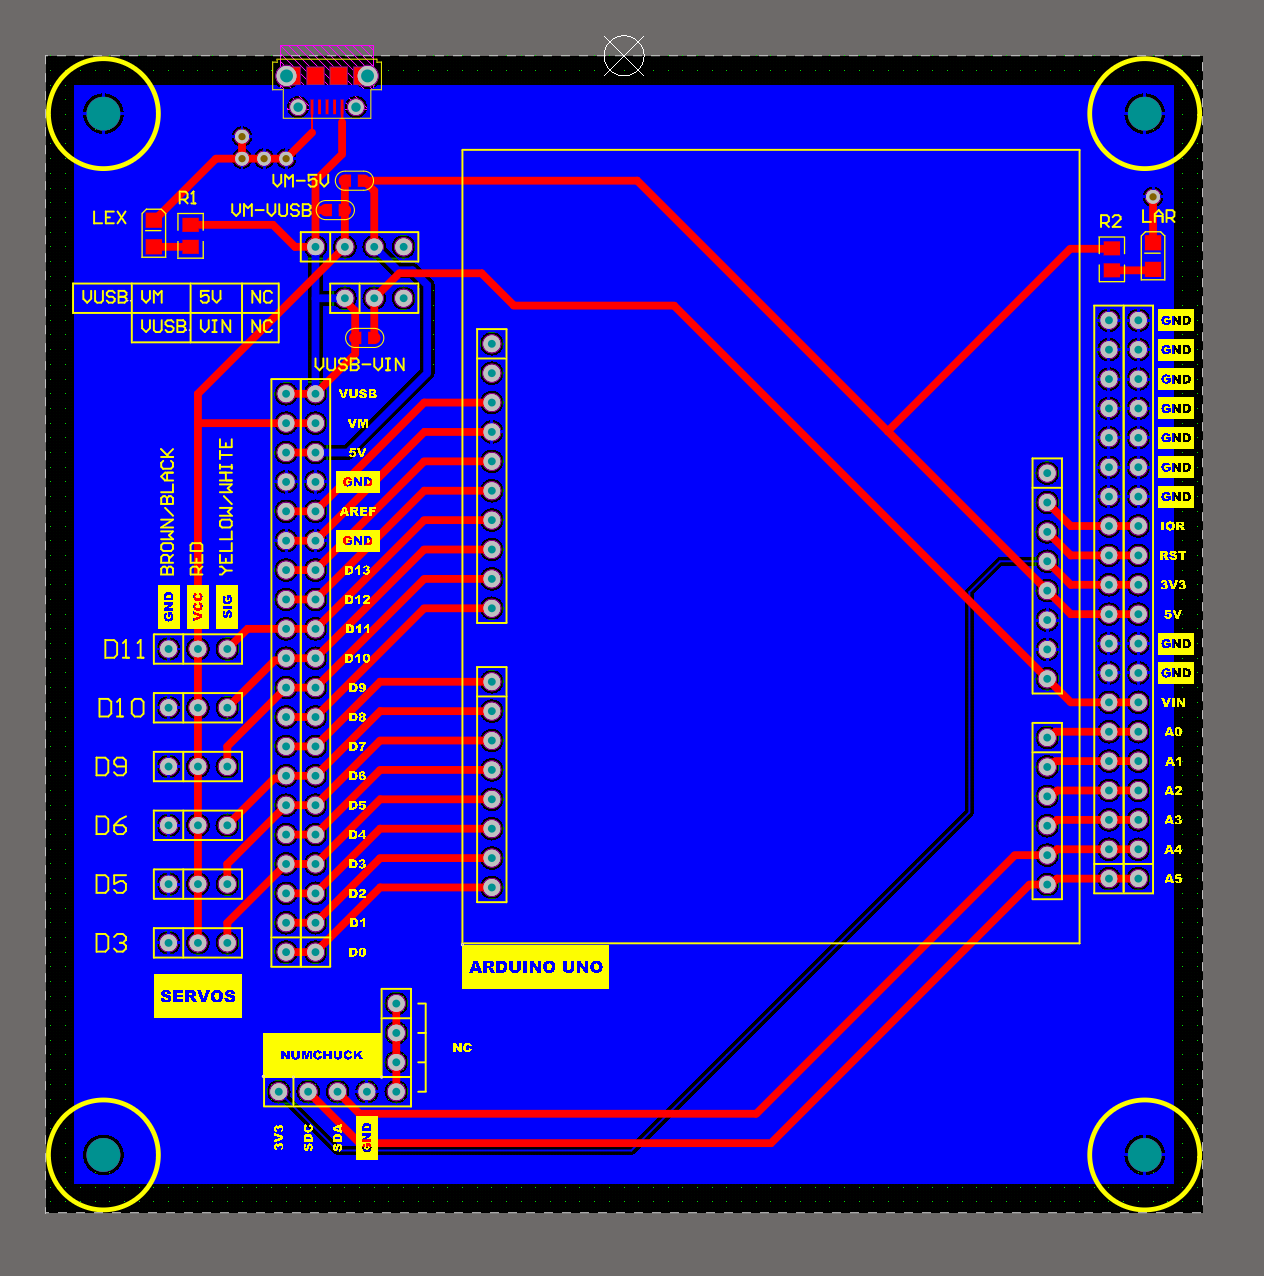
This works by simply mounting the Arduino, servo motors and nunchuck to the PCB~
Another feature of this robot is how we hacked a Wii remote, logically, for us the Wii remote was the most intuitive option to control a robotic arm since it has two buttons and a joystick. They are are rediculously cheap from Alibaba.
They are very easy to hack, all you need are the Arduino libraries some smart people have created 😂